Welcome
To
![]()
Building A One Piece Door For My Eagle
By Gene Lewis
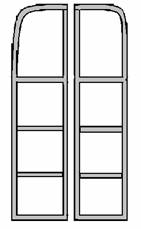
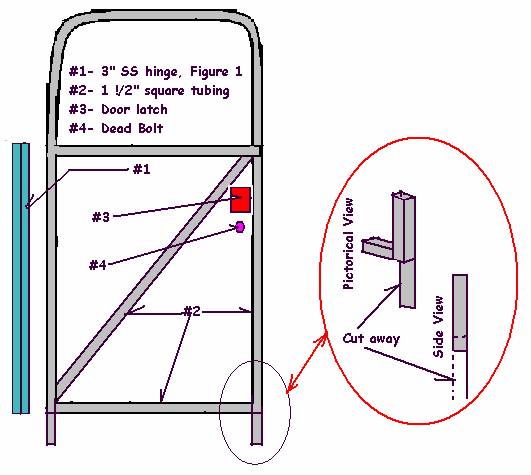
The way I see it U have 2 choices. Option #1: Existing Doors stripped to 1½” framework. Replace any rotten frame with 1½” square tubing. Wire brush well removing all surface rust. Spray or paint with a rust killer and then use a good primer on all surfaces. Figure 1 should represent your present 2-piece door, assuming there is no rust, LOL, LOL.
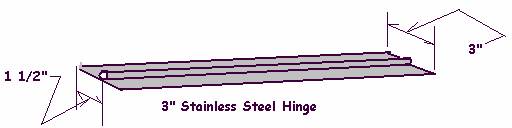
Note: Overlook the rough sketches; hopefully they will get the point across. In this sketch (Figure 2) U will find the 1½” Stainless Steel Hinge
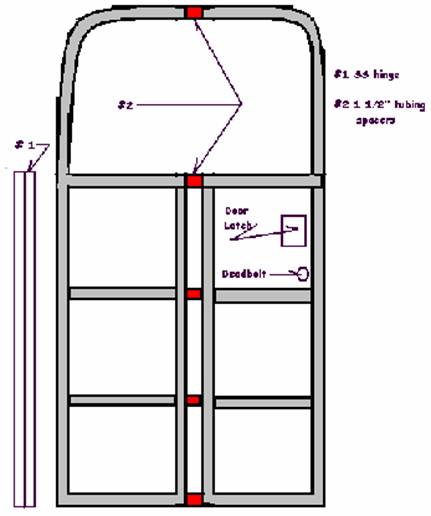
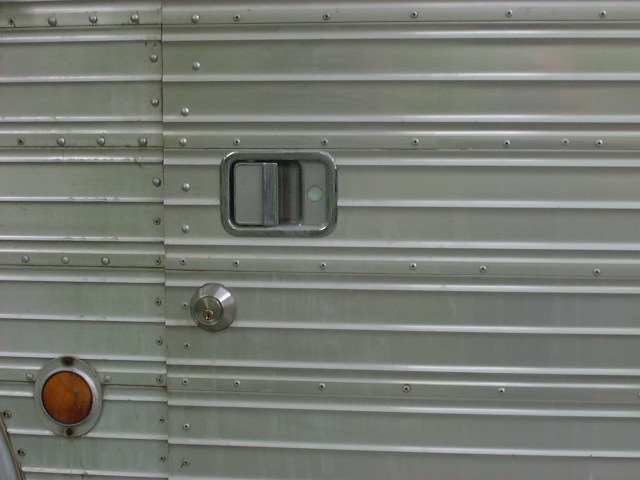
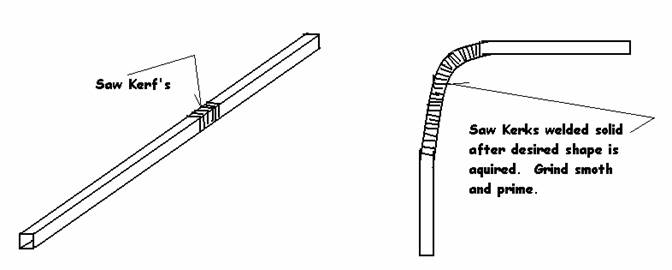
1 - Mount the hinge on the doorframe and then on the coach. This is for alignment so use only 2 or 3 rivets (or self taping hex-head screws) on either surface (U will be taking this off and on more than twice). 2 - Next determine the length of spacers U will need and cut from 1½” square tubing (Shown in red – Figure 3). Weld these spacers in place, grind down smooth and prime. 3 - When the framework is welder and is ONE PIECE cut the 2 supports out that supported the two windows allowing U to have ONE large window. IMO a more professional look. 4 - Mount the Door latch (Mine came from a big truck junk yard – from a wrecked Freightliner - $10.00) and Dead Bolt (found a SS one at Big Lots for less than $6.00 bucks). 5 - Once all welding is completed I chose to fill all my door tubing with GREAT STUFF (expandable foam in aerosol cans available at Lowe’s or HD) to eliminate the gathering of condensation and rust. 6 - Paint all surfaces with a GOO…………………..D metal paint 7 - When door is installed U can begin to put your Eagle aluminum siding on using the existing pieces on the body to align all joints. A number of places have new Eagle siding available or U could pick up a baggage compartment door from a Junker and remove that siding and use it (a $$ saver). If U have trouble finding a source let me know – I do know where some Original Eagle Siding was and I assume he still has it on hand. SO MUCH FOR USING THE EXISTING DOOR FRAMES The reason I did not use my old doors was quite simple – when I stripped them down I found the bottom half being held together literally by the Eagle siding. Because of the severe condition I decided to make the door from scratch. I had to find a metal fabrication shop that could bend 1½” square tubing. Here is the procedure I followed; 1 - Using the cardboard from a mattress or refrigerator (most any furniture store will gladly supply U with the cardboard). Hold this up to the opening and make yourself a pattern. Be sure U mark all sides, top and bottom. 2 - Take the pattern to the fabricator and tell them to copy the pattern and make it 1” narrower on the sides and top. This is an important step and U will need a MINIMUM of 1” – this can vary up to 1½”. This will allow for weather stripping. Leave the sides about 6” longer than the opening. This will be cut to fit the opening when U start fitting the door to the opening. It will be necessary to cut the outer edges of the doorframe in order for the door to close.
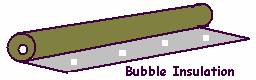
4 - Mount the hinge on the doorframe and then on the coach. This is for alignment so use only 2 or 3 rivets (or self taping hex-head screws) on either surface (U will be taking this off and on more than twice). 5 - Bottom horizontal on the door should be about ¼ to ½ inch above the “finished” level of the first step. This allows for bubble insulation (Figure 5) that will eliminate moisture and air.
7 - With the door latch and dead bolt installed on the door it is time to install the latch bolt on the doorframe. Make it adjustable – U will appreciate this later. 8 - Once all welding is completed I chose to fill all my door tubing with GREAT STUFF (expandable foam in aerosol cans available at Lowe’s or Home Depot) to eliminate the gathering of condensation and rust. 9 - Paint all surfaces with a GOO…………………..D metal paint 10 - When door is installed U can begin to put your Eagle aluminum siding on using the existing pieces on the body to align all joints. A number of places have new Eagle siding available or U could pick up a baggage compartment door from a Junker and remove that siding and use it (a $$ saver). If U have trouble finding a source let me know – I do know where some Original Eagle Siding was and I assume he still has it on hand. 11 - You can now install your insulation at this point. I chose to use two layers of ½” blue sheet insulation found at Lowe’s or Home Depot. Liquid nails hold it in place nicely.
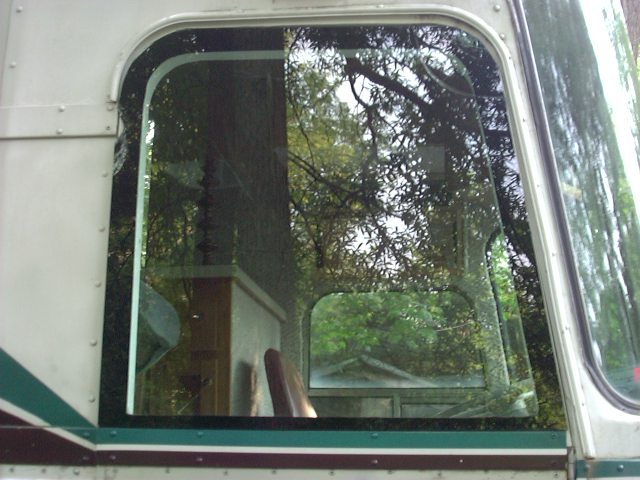
If U want to look around a little U might find a builder who has some scrap that they have left over from pouring a slab floor. The price is right going this way. Contractors have to pay to have their scrap hauled off so U are saving him $$$. 12 - I was fortunate enough to find an aluminum sign that a friend of mine had in his scrap pile. He had sold his paving business a few months earlier. I cut out a piece that could be glued and riveted in 4 places to the window frame area. I cut this large enough to cover a couple of #2 Have a Glass Shop cut the safety glass to fit the frame. They will use a special paint around the edge about 1½” wide. They will then apply a heavy bead of black windshields adhesive and when it sets U are set. I was surprised, at the look and the final out come. See Figure 6.
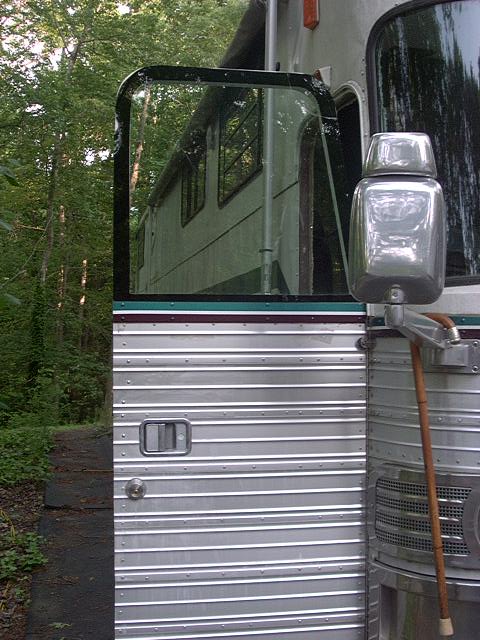
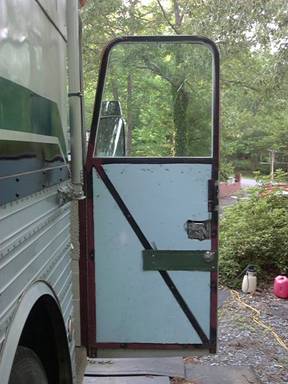
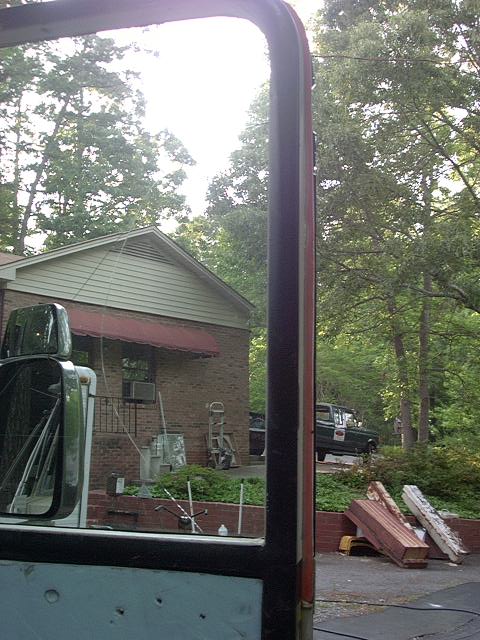
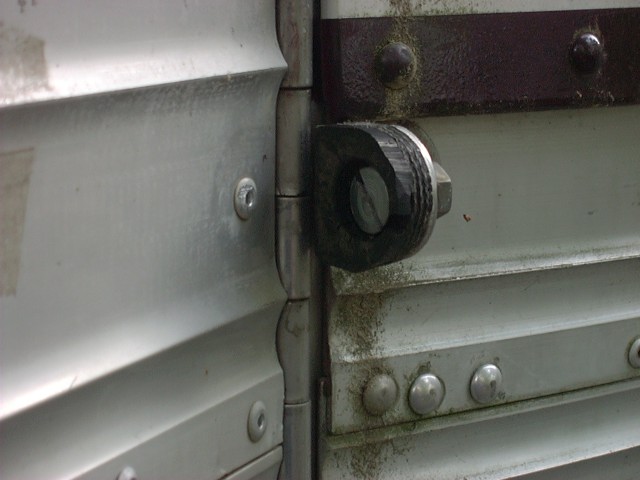
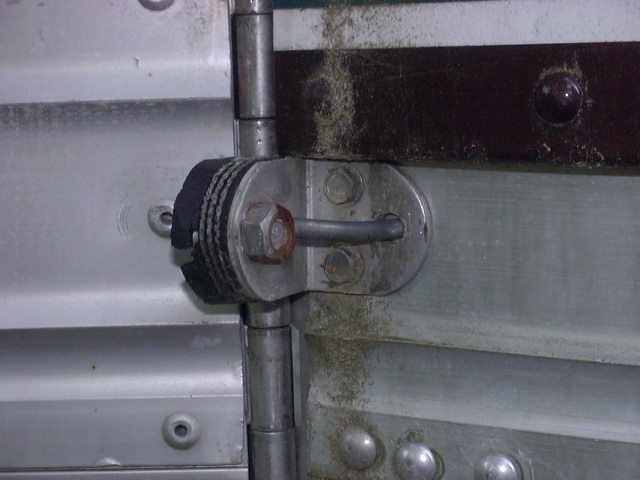
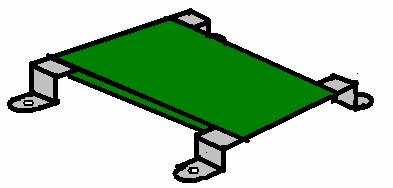
14 - Here are a couple of pictures of the door that may be helpful. 15 - You will need some type of door stop or restraint. Here is a door stop that I made from scrap stuff. Don’t look at the dirt – the coach needs washing – on the list to do – one day.
Two brackets – one fastened to coach frame about midway down door opening and the other at a corresponding point on the hinged frame of the door. The green is either webbing (preferably nylon – if you need a piece let me know) or a piece of an old leather belt.
Good Luck on your endeavor. ~ ~ About the Author ~ ~ Gene Lewis received a B.S. Degree in Industrial Arts from East Carolina University, in 1963. He spent 7 years in the classroom as an Industrial Arts Teacher and then ventured into business for himself in sales and sales management. During the past 30 years he has continued his interest in different businesses as well as the industrial trades. In 1965 he built a fold up camper trailer complete with a bed slide-out. Then in 1967 he built a 10’-6" slide in truck camper and in June of 1968 he and his wife made an 8 week trip to Alaska. Some 4 years later he moved up to Class A Motor Homes. It was during this time he was introduced to converted buses and was bitten with the ‘bus nut bug’. Over the years he has remained active in designing and repairing different types of RV’s and accessories. With the demands of a growing business and family the idea of converting a bus had to remain only a dream. The dream became a reality, when out of the blue, a deal was struck for a 1968 Model 05 Silver Eagle in great shape, complete with all the records and paper work from the day it was built in Belgium. The decision was made to convert the bus to a custom coach done by him and for him…. his way. Gene, with is wonderful wife Frances, have enjoyed the world of camping and RVing since the began there wonderful trip, called marriage, some 43 years ago. He and his wife have two married children. They presently make their home in Buies Creek, NC 27506. = = = = = = = = = = = = = = = = = = = = = = = = = = = = = = = = = = = = = = = = = = = = = = = = = = = = = = Questions and comments can be addressed to the author via the web at: = = = = = = = = = = = = = = = = = = = = = = = = = = = = = = = = = = = = = = = = = = = = = = = = = = = = = = Disclaimer: This article is for information and educational purposes only. Any liabilities resulting in the use of this method of raising the roof of a bus is strictly confined to the individuals involved in the actual procedure. 7.10.06 |