|
|
North Florida Bus ConversionC. Fred Hobe
|
Installing a
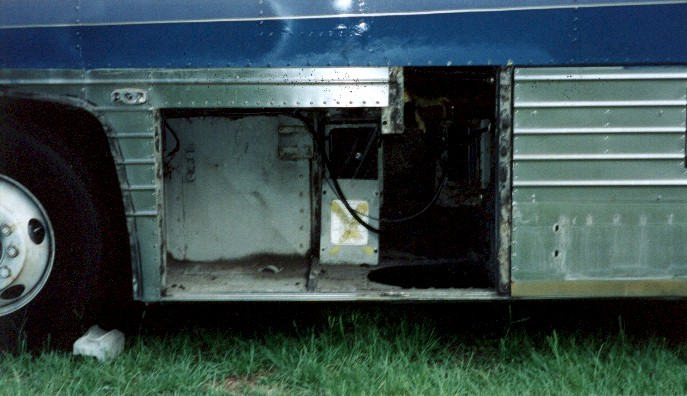
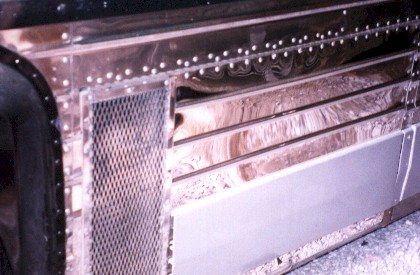
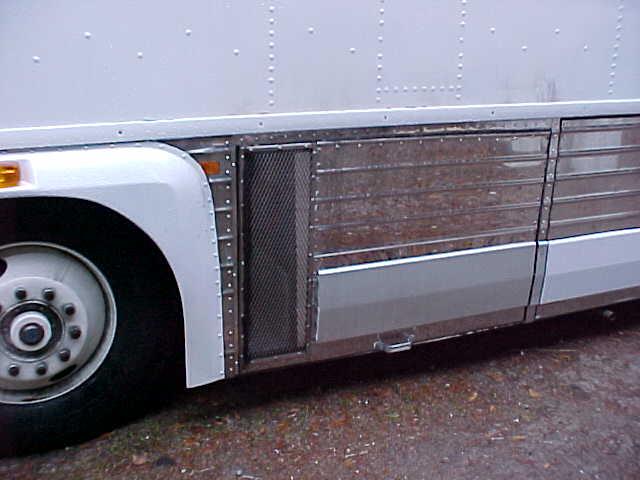
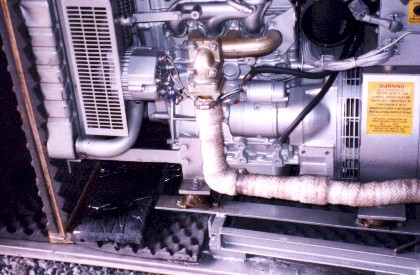
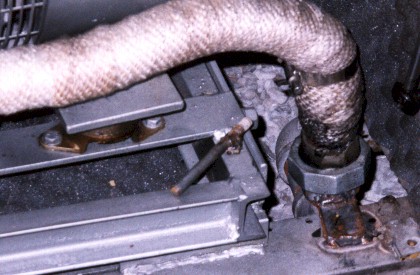
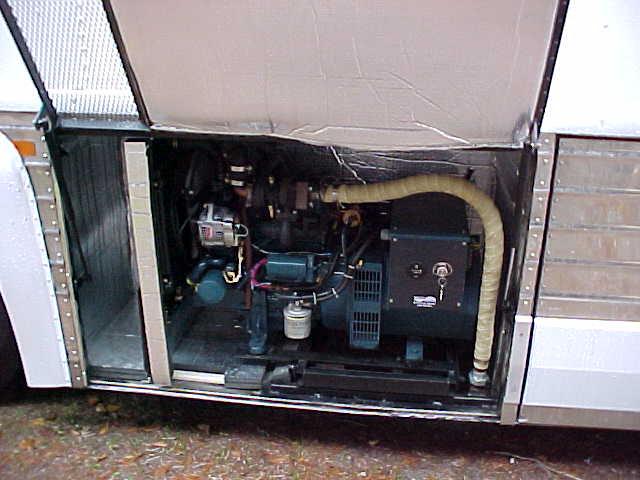
generator in an MCI I have an 8KW in my coach and it does just fine. The reason is that one air conditioner draws 1300 watts and the water heater draws another 1500 watts, one or two light might use another 50 watts. That is about half the capacity of the gen-set. All the manufactures tell you to run you generator with around half it load capacity, as that is were it works the best. At that load it will use around a quart of fuel a hour. Some use a little more. And you aren’t pushing it to run hot. Now you have to make up your mind as to were you are going to install it. I used the bus air conditioner condenser bay as shown in pictures below. If you use the small gen-set, an 8KW will fit in this bay with a slider on it to pull it out to service. You have 28 inches from the floor to the roof. You have to remove the center post by cutting it out as show in photos. Now you have to close in the top section. I weld a piece of 1-1/2 inch angle iron in this space, then I put a plywood roof in it. I now insulate this area, it will take 4 inches. I now close in this opening with the stainless steel siding I took off the lower part of this opening. After you have removed all the pipes and electric connections from this area, also the big round air discharge vent, you can get ready to cut the bottom of the plywood in the back of this compartment, behind were you took out the discharge vent. Start at the corner and cut up 4 inches. Now cut straight across to the other side stopping at the post. Cut down to floor and remove this strip of wood. Now pound down the pan that is inside the condenser compartment. You should have all this out by now [big job]. Now you are ready to measure to make your slide out. If you chose to use a bigger gen-set like a 15KW then you will have to take the whole section of plywood out also you will have to reroute and move up some of the pipes that are in the condenser compartment as you don’t have enough height to put it in as photo shows. You also will not close in the top as described above. Your gen-set will slide in going straight into the bay and you will have to build a different door to close it. On the front side of this compartment it makes a good battery compartment and you can install 4 - 8Ds in it with a little modification. Don’t forget it needs to be vented.
Material that you will need. One length of two inch channel iron, one length of 2 inch angle iron, 4 ft. by 2 inch by ¼ inch flat iron and 10 Torrington # crsb-22 bearings or Mcgill cf-1-3/8-sb. Now cut two pieces of your channel iron 52 inches long, and two pieces 17-½ long. Weld these to make a rectangle. Set both pieces of channel iron inside of the 52 inch pieces, with the channel facing out. Weld the 17-½ pieces of channel with the flat side facing out. On the angle iron, cut two pieces 53 inches long, one piece of angle iron 21 inches long and one piece of flat iron 17-½ long. Now take them to your drill press and drill a 3/8 hole one inch down and one inch in, on both of your long angle irons. And a hole every 11 inches back. Make sure that they are exactly 1 inch down-make a jig, so you are right. Weld these together with the angles facing in. You will have to notch the angle iron on the back so that the back piece can lay flat to the bottom when you weld. Make sure that you are making it square The front is the hole that is 1 inch in. It should be 21-½ wide when complete. You can install your bearings in the holes and tighten, you will have to put washers on the inside and on the out side. You should be able to slide you channel iron frame into the angle iron frame. Now you can slide this into your coach in the hole that you cut described above. Pull your slide in, out so that the back of the slide out is right up to the back of the plywood in the condenser compartment. and weld a stop on the outside of the angle iron frame, one on each side. These should be about 3 inches long with a bearing that rides on the channel iron - this keeps it from tipping. The bearing should be just touching the channel iron, Now weld a short piece of flat stock that will slide up to and touch the top bearing brace. This is what gives you your length of slide out. Do this before you weld the front down. Because the pan is ½ inch higher you will have to put a piece of iron on the bottom in the front. Now make sure that it is laying flat on the inside of the pan, and weld it to the rail of the coach 1- ¼ inches in from the side so that your door will close.You now can drill ½ inch holes down through the bottom. Make sure that you measure and come out in the flat place on the under side of coach. I use two bolts on each side rail one near the back, the other half way up. Check to make sure where your fuel fill tube is that goes to your auxiliary tank is on MCI's 7 and 8s. More coming on how to install you Gen Set on your slide out. Fred
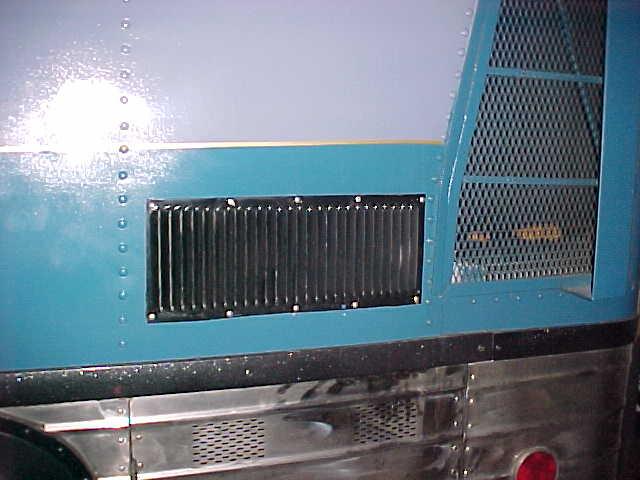
Make your coach breathe better. When I started to look at the way MCIs pull in the air to the motor, I was sure that I wasn’t getting the air I needed for the turboed motor. I went and bought a vacuum gage and installed it on the air intake line. Sure enough it was pulling about 15 on gage. I thought that the air filter was bad. Went to junk yard and bought a big dry air filter from a Freight Liner cut in the air ways for the air compressor and installed a new $80 Donaldson filter. I cranked it up still was pulling 6 on vacuum gage. The newer MC9's have a big opening above the radiator on drivers side. I then cut in a 12 inch by 6 inch opening and installed a louver over it, in front of radiator. This location is out of the vacuum created from the air going past the factory opening which is on the inside left side of the screen. I now pull a very small vacuum. Installed K&M filter, very expensive. It is suppose to breathe much better. It still pulls a small amount of vacuum. Same as with standard filter. But coach is getting better mileage and no black smoke under hard acceleration.
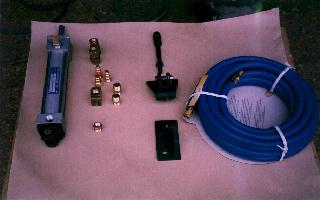
Water pumps in your coach. How many times have you been on the road, tired and want a good shower, and that 12 volt pump that you have just wont put out more than a trickle. Here is a way to get a shower just like the one that you get at home. Go to Home Depot and get a Flotec Model FPOF300AC. This little pump works off your 120volt system it only draws 2 amps and put out twice as much water as your 12 volt one. I put a T in the line that runs to the 12 volt pump and install the 120 volt pump. Hook it up with a check valve, and tie it into your water system. You need a pressure switch that is set at 35 pounds pressure on it. Run the power to a switch in the bath room. Now you can turn it on and off as you want. This pump is very quite, and you can use it as a spare or use it all the time.If you need a lot of water at one time you can run both pumps at the same time. Put a hose fitting in your bay and hook up a hose and you can use it as a fire fighter if needed. How to build a air braking system for under $200.00 This system is better
than the $500 plus systems that I have seen. All you do to take it out is take two pins
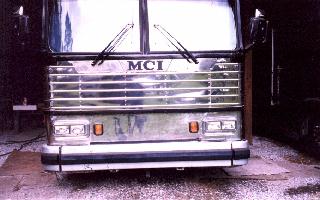
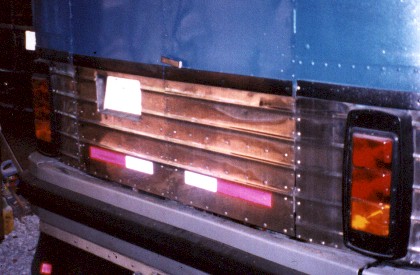
out and release the bunggee. Takes about 15 seconds. If you have to replace your front skin, this is how to make it look newer. I
think the original round turn signals make the coach show their age. Also note the
upgraded mirrors. You can buy the square tail lights from most trailer sales yards. They are used on quite a few trailers, cost about $8 a piece. It takes 4 red and two yellow. On some it comes as one unit, I think Coachman uses the one piece unit. Now take your tail light frame out and cut the center out. Cut to fit the new tail light bracket. Spray paint the frame and install new tail lights. You will have to install 24 volt double element bulbs. This is the time to polish your S.S. before you reinstall the tail lights.
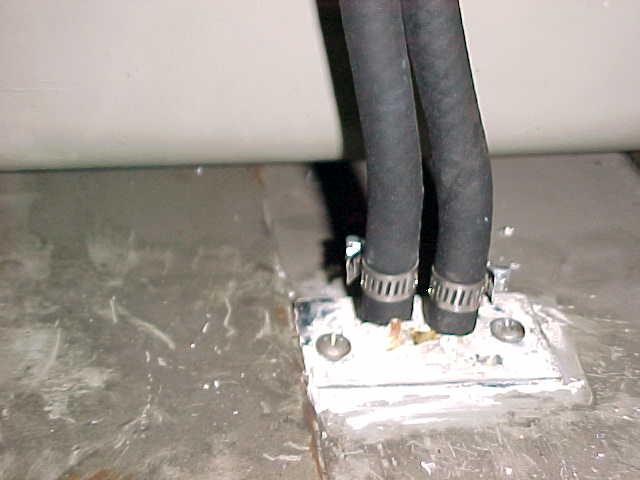
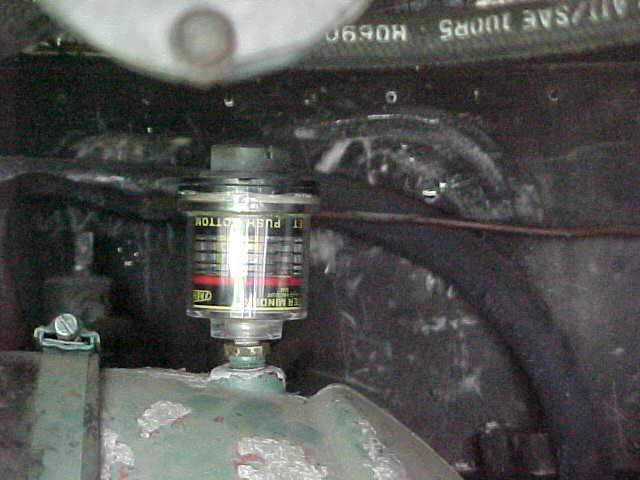
Take off
the cover on the top of your tank an drill a 1-1/4 inch hole using a hole saw. In the top
of the tank being careful not to get to many saw shaving into the tank. I put a vacuum
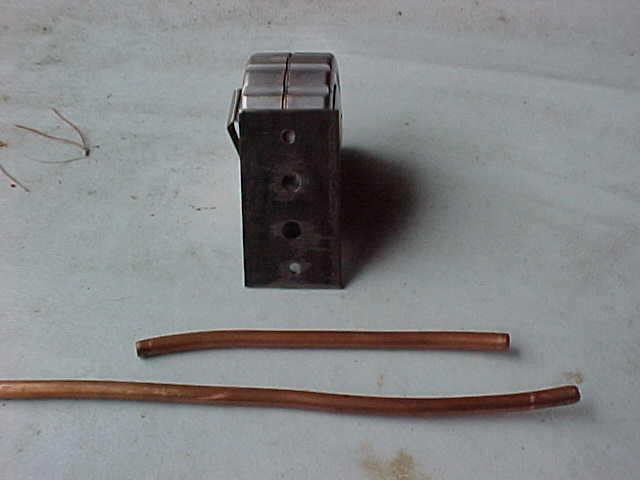
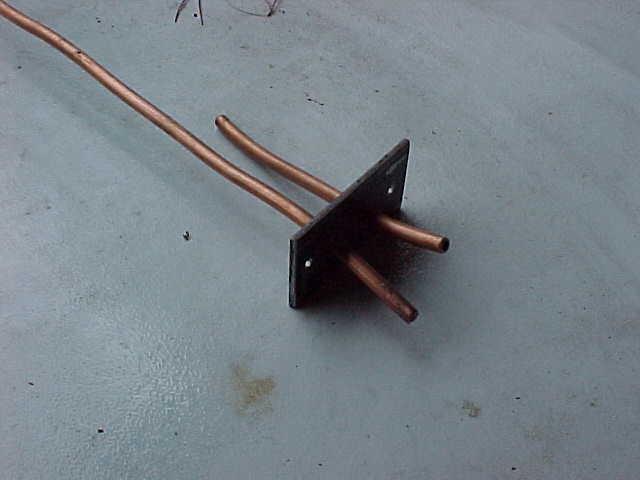
cleaner hose up on top as I cut. Now buy a one inch pipe flange and the plug fitting that
screws into it. Take it and drill two 3/8 holes in it they will be close together. Now
take two pieces of ¼ inch copper tubing, one about 27 inches long the other about eight
inches long and braze them into the cap. Let the long one stick out about 4 inches the
short one about 2 inches out. Make sure that you sweat them in so that you don’t have
any leaks around the base of the tubs. Now I use a good silicone gasket material black
type and drill and screw it on top of the tank. Install the cap with the two pipes in and
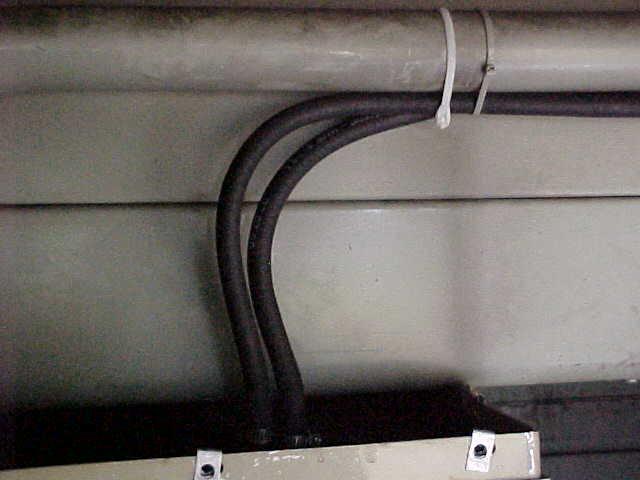
you have your feed for your gen set. I now run my fuel lines to gen set along the bottom
of the floor of the coach to the gen set and you have a nice neat hook up. The long tub is
feed line the short is return. |
|