A little tip on
water
When my coach sits at home I keep the tank full, and add Clorox.
This keeps bacteria from forming. Then when we are ready to travel I flush the system
running the water through a whole house water filter, taste and odor cartridge. It is
easier to change the filter when it is not hooked to the water pipes in the coach. I use
two hose fittings and set the filter in the hole that I run my electric and sewer lines
through. Fill the tank, screw the short hose on the outside of filter then to the inside
of the filter and store till needed again.
Making ready to insulate
When having your coach foamed, you can have this done at most
large truck trailer repair shops like Great Dane or Fruehauf. First make sure that you
have all the wiring that you are going to need, in place. This includes your TV wire to
front and rear, also wire for backup monitor camera. These wires have to be secured tight
to the roof. If not, as the foam expands, they will be pushed down when the foam
gets between them and the roof. When this happens you will cut them when you trim the foam
to the ribs. Don't use duct tape as it turns lose. I use real tough packing tape that
bonds strong to the roof. Never cut a hole in the roof for air conditioners with out
reinforcing with steel on all sides of your cut. Run the wires between the rib where the
opening is cut. The rib that run the length of the coach are part of the strength of the
coach On MCI and GMC's.
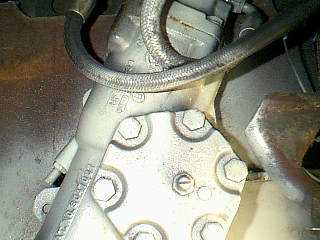
Integral power steering in your MCI 5, 6, 7, 8,and early 9s for around $1000
Installing integral power steering in your MCI is real easy and
can be done for about a 1K. That is if you can weld and have a cutting torch. It sure
makes them steer good. All radial rod bushing have to be tight and good shocks on the
front.
First find a truck
salvage yard. Look for a Mack R model. These are the only trucks that I know of that use
an in the frame steering sector. There are two models one is short and a little rounder,
the other longer and thinner. Both are Ross HF64 series. One is number HF642984-05 and the
other is HFB645998. Both are 12K axle weight sectors. MCI's are a little less than 12k.
These two sectors work very well. The cost should be between $300 and $500. The main
reason to get your sector from a salvage yard is you can get the pittman arm and the U
joint on the top of the sector. If it should be bad you still need a core to be able to
get a rebuilt one. So don’t pay more than the core charge which is 3 or 4 hundred
dollars. Try to get one out of a wreck, as it was most likely working. Both the pittman
arm and the U joint are hard to find, if you don’t get them together. Now comes the
fun part.
You need to cut all the existing power steering out , Including
the mounting braces that hold the old sector in. Also the ram that is connected to the
pitman arm. And the old pitman arm as you won’t use either. But you will need the
slip coupling on the top of the old sector. Now that you have everything cut out it is
time to make a plywood template. Also, now is the time to clean out all the dirt and oil
from both compartments, there will be a lot of it. Cut the plywood to fit from the top of
the compartment to the ledge that run about 8 inches up from the front of coach to the
frame were old ram was connected. It only needs to be about 14 inches long. Now line up
the new sector so that it is in line with the hole in the floor and straight in line with
the old steering column. Make sure that you get the U joint that is on the new sector as
you will have to cut the top off and cut the top off the old slip joint.
Now line it up and weld the slip joint to the bottom of the U
joint, as the old slip joint is to big to fit the new sector. Now slide it half way onto
the steering rod and mark it position on the plywood. Now, using your plywood as a guide,
lay out your template on 3/8 steel plate cut to fit and drill for the new sector to fit on
plate. On the long sector the plate will be 1 inch toward the drivers side of the middle
of existing brace. On the short one you will have to move almost 3 inches to make it line
up to the center of the hole in the floor board. Now you weld a piece of 3/8 flat steel on
top of center brace either 4 inches or 2 inches wide. Weld your mounting plate to this and
to the top of the floor, putting angle braces on both sides. Also weld to the front of
coach putting braces on these as well. I take off the stainless steel in front under
the head lights. It makes it easier to get into for welding and you won’t burn your
stainless steel. Make sure that you get the pittman arm that goes with your new sector.
On some your drag link will fit by making it about ¾ inches
longer. On others you may have to have it machined to fit. Hook up you lines and you are
ready to test. You may have to increase the pressure on the pump but most of the time you
don’t. Replace any hoses that look old as they will break when you need it the most.
For more info and help get in touch with me.
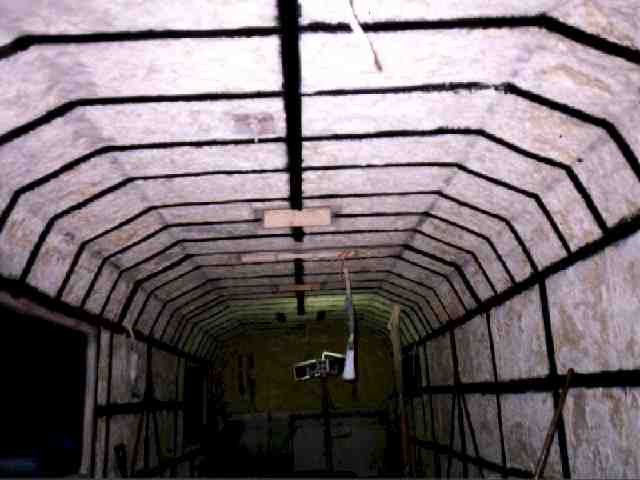
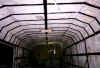
How to add additional insulation and save on interior plywood
The following photos show ribs installed on 16 inch centers and a
flat roof. This provide addition space for 4 inches of insulation, wiring, recessed
lights, and air conditioning ducts. By putting the extra ribs in you don’t waste
plywood . Also I use to worry about putting screws into my over head wires. With the 4
inches between the rib and the roof there is no chance of hitting them as I run them in
the center at the roof. I did run wires in conduit at one time but found that it was hard
to get them into the main, as space is so limited. I now don’t worry about them as
those extension cords (see tip on "Way to save money on wiring") are
double insulated and I haven’t had any trouble in 10 years and thousand of miles
shaking down the road. Also where to place the main is always a problem. I use a lot of
wire in the coach and half of it is in the roof. I put indirect lighting in the ceiling
that is controlled by wall switches. I also put a lot of wall plugs in . All of these are
run in the insulation with no problems.- As long as you keep them tight to the skin. Also
getting wires from one side of the coach to the other, you need to run them in the roof.
As running them under the floor, they are more exposed to damage than in the walls.
 3/8" plywood
installed
3/8" plywood
installed
Photo of ribs on 18" centers Note colored extension
cords.

Finished Lowered Ceiling
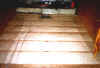
Laying out the floor to insulate
I start by cutting 2x4 in half, then cut to 92 inches long.
Starting at the rear and working forward, I screw them down to the floor with 2-1/4 inch
screws on 16 inch centers. I then cut 1-1/2 inch block foam to fit tight between the
2x4's. You can also use the cutting that come from the roof and walls, if you use a cutter
that takes it off like pop corn. On this I then cover with a heavy plastic sheeting, to
keep the material from blowing around .When you lay the plywood use ¾ inch 5 ply cut 92
inch. This is then screwed down using 1-5/8 screws. Between each sheet of plywood I place
a piece of 6 mill plastic about 6 inches wide between the sheet where the ends touch. This
keeps them from squeaking at the joints. After the floor is down I go back with a razor
knife and cut the plastic flush to the floor. This gives you a R value of about 12 on the
floor. It makes a big difference in winter and summer.

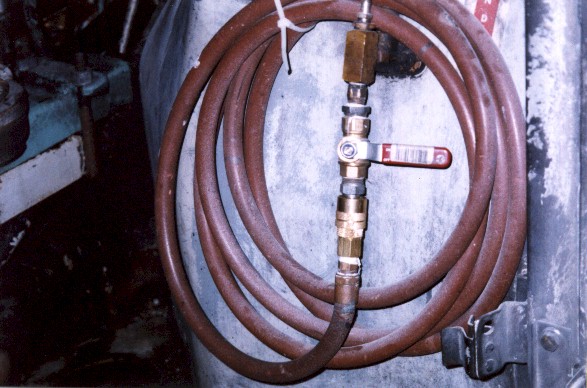
Being a good neighbor at RV parks
I install a 1-1/2 horse power pancake compressor in the bay of
the coach. Run a ¼ inch line through the old air conditioner piping to the rear of coach
, It comes out just above the valve where you can fill your coach from a air compressor.
Install a ball shut off valve, where the sharader valve is now. On it I put a quick
disconnect fitting on the hose. Now you can hook this up to the fill valve. When I am
eating breakfast I turn the compressor on and open ball valve. When I am through I shut
off ball valve start
engine and drive out. No running the engine for 10 minuets and stinking your neighbor out.
These little compressors can also be used to keep your tires up. They will pump 125 pounds
of air.
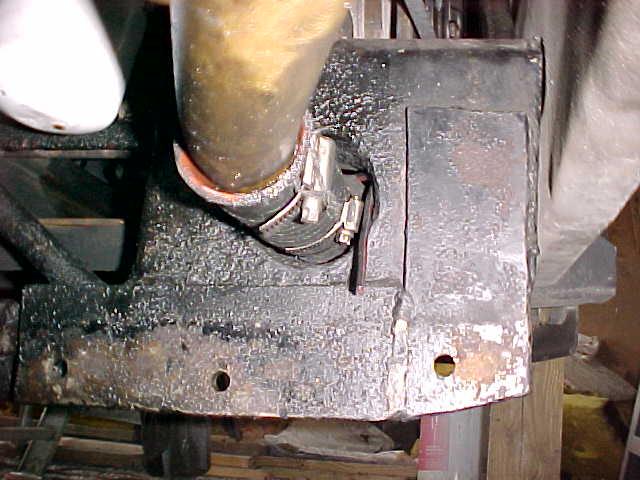
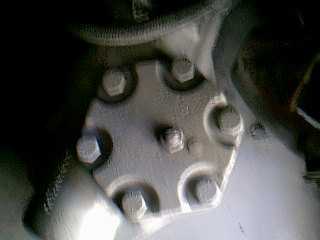
Keeping house batteries up on MCI's
After you have removed your old
air conditioner, make a bracket and mount a heavy duty truck alternator 100+ amps, run it
off the center pulley on your 8V71. Now run a #4 welding cable through the small copper
air conditioner pipe to the house batteries. I locate them in the compartment where the
old condenser was removed. I also use the house batteries to power my head lights. When
under way you will never have run down batteries.
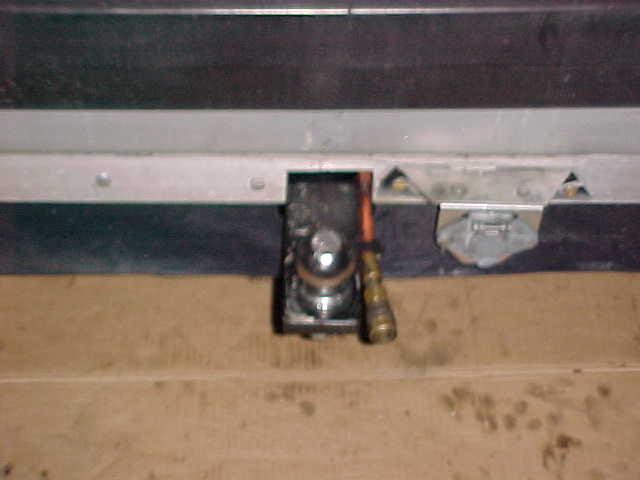
Building a hitch to pull your toad on an MCI
Though this tip is mainly for
MCI's, it is very similar for GMC buses. I think that it is dangerous to put a heavy
tongue weigh on MCI and GMC hitches. I have seen the motor mounts on these coaches with
cracks in them . Pulling and pushing on the motor cradle does not put the stress on them
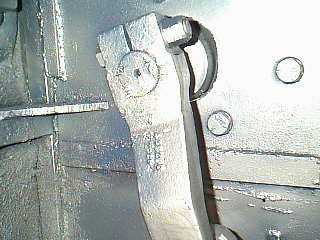
as much as down force weight on the motor cradle. First get 3/8 by 3 inch flat steel. Cut
2 pieces 8 inches long and 2 pieces 10 inches long. Weld the 8 inch piece to the end off
the 10 inch piece in an L shape. Grind the edge so you get a strong weld. Now cut 2 pieces
12 inches long. Fit the L shaped piece to the motor mount with the L pointed up. On the
left side it will fit just back of the water line that runs across the coach. Line it up
so that it is under the bumper about 4 inches. And mark were the cradle touches. This is
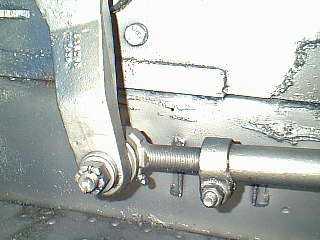
were you will be wielding later. Now lay the 12 inch piece on the L shaped piece and drill
3 ,1/2 inch holes below the marked line. I spot weld them together so that they don’t
move. After you have them drilled, mark them right and left. Now cut your spot weld and
put your six ½ bolts in and tighten. The 2 bolts that go to the front, put then pointing
toward the out side of the coach. If you point them toward the inside of coach you wont be
able to get them out. Now weld these brackets to the motor cradle. With them bolted
together, measure and cut your 3 inch 3/8 thick angle iron to fit between the two
brackets, as close to the bumper as you can get. Weld the angle iron to the mounts. Spot
weld so they won’t come apart. Now take bolts out and take this out and finish
welding. You can now put your receiver on this after you install angle iron. The angle
iron needs to be installed so that you can weld the receiver on the top and end of the
angle iron.The receiver can be put in the center or it can be off-set to drivers side a
foot. This makes it easier to make a right turn as you are turning to the inside lane and
this is were most damage happens. Also you can see your toad a lot easier. It took me
almost as long to tell how as to build it. Good luck on this project.
Engine bay outlet
While you are wiring your coach,
run #12 wire down where you have taken the old bathroom out, to the compartment below. Put
a plug in this compartment, as it makes a nice place to hook up a light when you are
working on the engine. Also if you install a block heater all you need to do is plug it in
and you are ready to start in the morning.
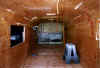
Floor Layout
After you have your floor down. Lay out all your
rooms walls and partitions with 2 inch masking tap. Put all fixtures where they will sit
on the tape layout. This includes shower sink basin, stool, cabinets, couches, tables,
chairs, everything that you know that you want to put in your coach. Then go back and make
sure that it will fit. The bathroom is very important as you need to know that your
pluming will come through the floor in the right location in the cargo bin. You need to
have the bedroom at least 8 feet at the floor from the bath wall or you will not come down
in the back bay. After you have everything laid out and know that you can get all your
pluming in, paint over your tape. After the paint is dry take up the masking tap. Now you
have a pattern that you can follow. It makes building the insides a lot easier and helps
you know if what you are planning will fit the space you have.
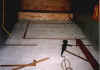
In the picture below, the floor is
painted and shows a lay out for the shower. It has two out lines. One for a 36 inch square
shower stall the other a 38 inch neo angle shower, as the customer didn’t know which
he wanted. When you lay out your shower make sure that the drain doesn’t come through
the main floor support which is 22 inches in from the side wall . This support should not
be cut as it ties into main motor support at the rear in front of drive axle.