" I don’t post much
on the BB's as most take it off, thinking that I am advertising. I have put on free
seminars at my shop for the people that are converting a coach and want to do a good job
and do it right. Twelve years ago there was very few coaches being built . And fewer
builders to get advice from. Now with all the BB's and BCM everyone is trying to build a
coach, and a lot won’t ask for help. It hurts me to see so many poorly built coaches
out there.
These tips are only one way to do these things. Use them to get
yourself thinking and as a starting place. I know that there are hundreds of ways to do
all these things some better than others. I look and try to do each coach a little better
than the last. To build one is a learning curve. If I can get those who read these tips to
start thinking, then you can make improvements and you will have a lot better coach."
Fred Hobe

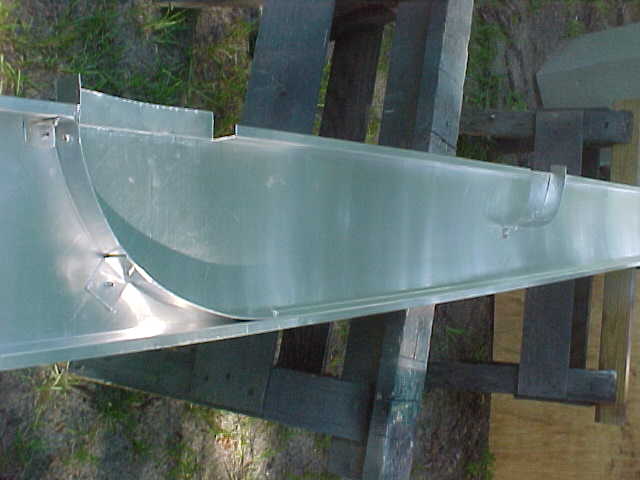
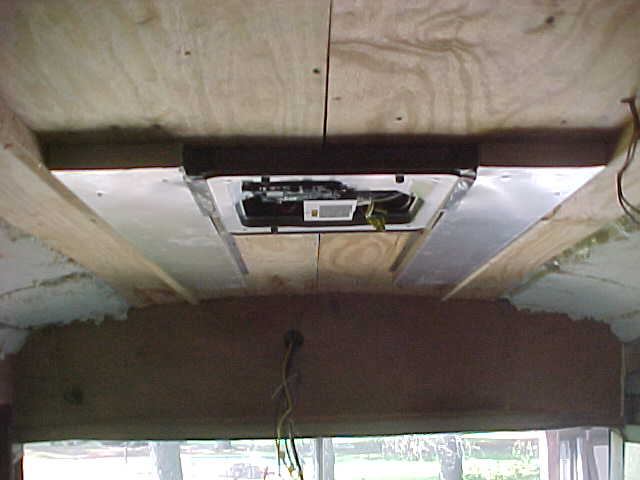
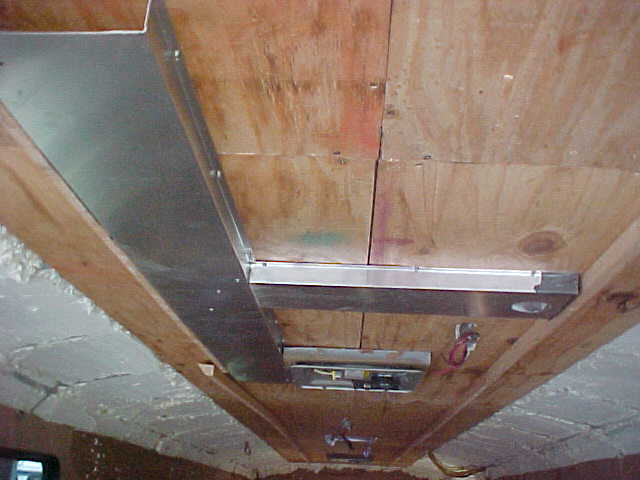
Installing Ducted Roof Air
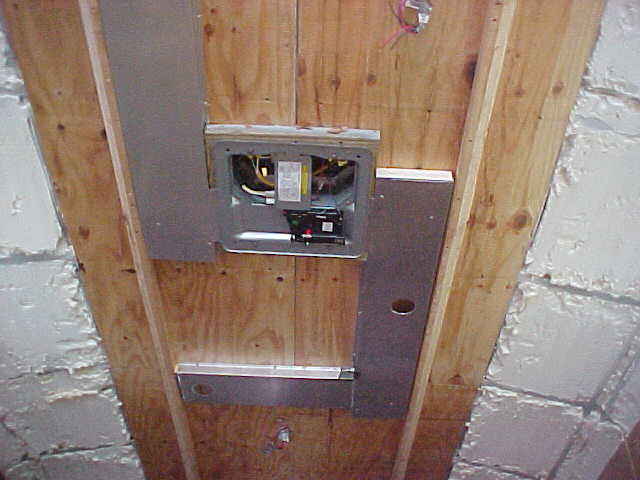
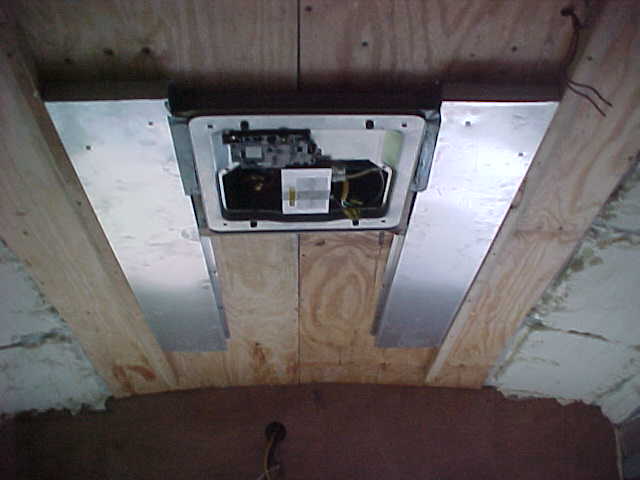
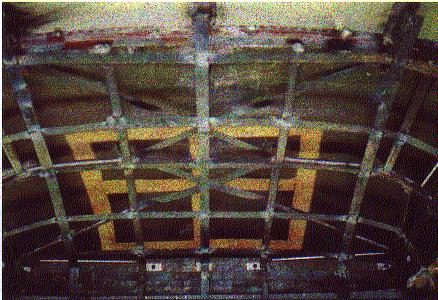
More and more ducted roof airs are going in. This is how I do it. I make up six duct 1-1/2 inch by 8 inches, 12 square inches total buy 8 foot long. 24 square inches per air conditioner. I install plywood on roof were duct will run. Next, I run the ducts to every part of the coach, each duct is 4 square inches, 24 total inches for each air conditioner. On the front one, I run all of the front air up to the front so driver is always cool. The middle one I run to the middle of the coach and install ducts about every 5 feet. The back one does the bedroom and bath. By doing it this way you can run your fantastic fans and not they will not interfere. I then put 1-1/2 foam insulation between the ducts and cover with plywood. On the coach in pictures below, insulation is installed with 4 inches in top and 2 in walls. I install curves were the air comes out of the side of air conditioner so that it has a smooth flow. Air doesn't like to come out of square corners. The pictures show the way that I make it go around corners. This makes the air flow much better, as it is spread over the entire coach.
Replacement for rubber hinge
This is the way to fix your rubber hinge for good.
It is easier to fix than installing new rubber on MCI 5 7 8 & 9 doors. If the battery
door rubber hinge brakes while going down the road it will fall out and is very expensive
to replace. Fix with full length piano hinge and it is fixed for ever. Use 2 ½ inch
stainless steel hinge and remove the rubber fittings. Rivet on were old fitting was and
you are done once and for all. Fred

Polishing your SS
I have polished a lot of MCI's. First you have to sand with 800 or
1000 wet sand paper. Then use a hi speed buffer with a 8 or 9 inch buffing pad. Use black
compound first then go to green. After about 3 hours on each baggage door it will shine
like a mirror. It takes about a week to do the coach. If in Fla. I have a man that will do
it for $300.00. If not in the area you can make it shine with a lot of time and sweat.
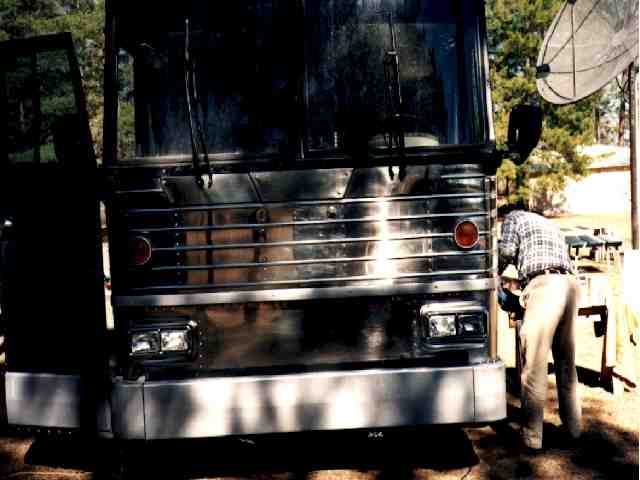
The front re-installed and polished.
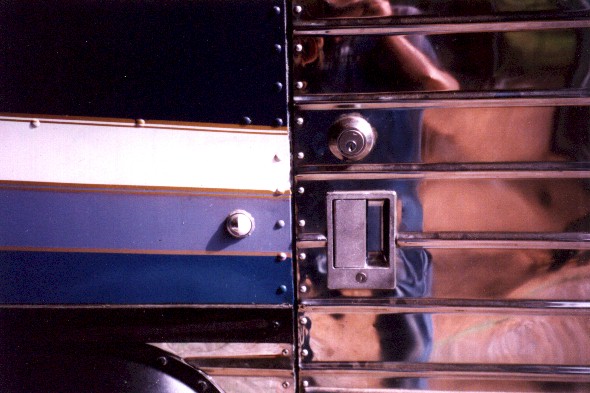
Entry door shine, also door light in another tip here.
The compound can be bought through Granger catalog. I first hand
sand with wet sand paper. This takes the mat finish off. Then I use a heavy duty 2500 rpm
buffer to polish. Put masking tape on trim as you will take the paint off when you get
close. Buff the whole coach with black compound then go back over it with the green
compound. After you have buffed the hell out of it, you clean off the excess compound with
mineral spirits. Then all you have to do is go over it with good cleaner wax about twice a
year. Don’t be afraid to put pressure on it, it will get hot. Keep moving the
buffer so as not to get so hot to stretch skin.
Winterizing your coach
Another little trick that only cost about $50.00, and will make
your coach so that you can use it in the winter. When you get your tanks for water and
waste, put them in a plywood box that is insulated on the top sides and bottom. Next, put
a water bed heater under them. They have a thermostat on them you can set to the lowest
setting, 50 degrees, this will keep the tanks from freezing in the coldest weather. Also
put a heat strip on the pipes and put insulation over them. You now have a safe,
winterized coach. Most home built coaches are just fare weather coaches.
Raising the roof
It is my believe that every coach should have the roof raised.
Reason - First, this is the best way to be able to insulate the floor. And second it is
the only way to be able to put 4 inches of insulation in the ceiling. First, you want to
make sure that your coach is not going to settle. Next, take a plum bob and drop it down
from the ceiling and mark the floor at the point with a small nail or screw. Do this in
the front and rear. When you cut and raise the roof, if the plum bob point touches the
same spot, your coach is the same as when you started. For information on bracing and
installing windows contact me at the number or email address below.
More on raising the roof
On MCI's the best way
to prevent settling during the roof raising process is to ensure all the air is out of the
air bags. Try to get it level on the floor so that you don’t have any variation in
the angle as it raises. It will work every time. I cut at the bottom of the windows, with
a Saw All. Cut the middle brace on both sides last, as this is also used as a guide. There
is exactly 11/2 inches between the center support. I then weld a piece of 11/2 tubing at
the bottom below the point of cut, then cut the double supports on both sides of the piece
that you just put in. This acts as a guide for the roof to slide up on. I jack mine up
with a screw jack that has a 12 inch lift, supporting the roof with 4x4 as I go. Lift the
back first and then the front, moving 2" inches at a time.
You have to know the
location of your windows and weld 11/2 square tubing 3 inches from were the window is to
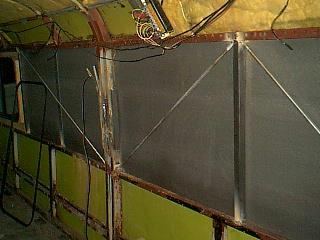
fit. Then I install the out side skin, and cut the opening for windows. I also X - brace
between all roof supports, using 5/8" round steel rods. I put them in the center of
the supports so that they won’t conduct heat and cold into the coach.
On the front you have
to space your bracing so that there is some place to screw your plywood to. This takes
careful planning as you have all kinds of angles at this point.
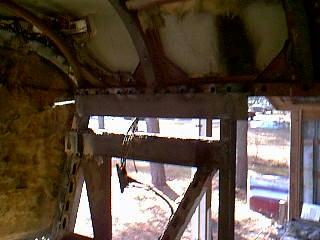
This shows the front hump taken out with new metal and bracing installed. Note the flat
strapping tying everything together.
Another tip on roof raising
Here on the east coast were shipping from the west coast is so
expensive on large packages, like front and rear caps. The cheapest way to solve the
problem when you raise the roof is a lot of the MCI 7 & 8 have had caps installed on
the front when they were in charter service. If yours has both caps on, here is a way to
save about 1K on your conversion.
First when you are going to raise
the roof you need to remove both caps. The rear cap is under the aluminum roof skin. To
get it out you need to drill all the rivets out and then take a heat gun and heat the
strip along the rivet line. As you do this, work the cap out and off the coach. You need
to do this in order to weld.
After you have the roof raised you
put the cap back on and rivet it down. Now install a metal strip the height of the raise
plus 2 inches. Now shape it to fit the contour of the back of the coach just above the
radiator line on the coach and rivet it along that line. With it up under the cap and
rivet it to the cap, space your rivets neat to match the rest of the coach. Make sure that
you install caulking between the fiberglass and your new metal strip.
On the front you do the same only
here you need to glass it in and sand to match the front cap. Its not a hard job and when
you get done you have a very nice looking cap that matches the original caps.
Another tip on roof raising
I cut the roof at the roof
header, the header will go up with the roof. I then add a piece of 1 3/4 square tubing to
the angle pieces that did hold the roof header. Now I add a piece of 1 3/4 from built line
to roof header, and weld this to the existing angle built line and header. I then add 3
inch by 1/4 flat brace across the roof header just below the holes so that the roof can be
riveted down. I also add another piece below were the roof header was and weld this across
the new tube that I welded on. When you raise the roof it moves the cap back 1-1/2 inches.
I weld a piece of 1 3/4 tubing onto existing rear tubing and weld it all along existing
tubing at top and bottom.
How to stop rust when you're converting the coach.
The main cause of
rust in a bus is moisture. First you need to remove the fiberglass that is in the coach as
when it get wet it takes forever to dry. Then on the square tubing that makes up the frame
work of MCI's and Eagles. Drill a ¼ inch hole every 8 inches and fill with can foam. What
happens is the difference between inside temperature and the out side temperature causes
condensation to form. This moisture then runs down to the floor and causes the tubes to
rust out. When they are filled with foam they can’t sweat any more, thus no more
rust. Cost to do a coach, about $10.00. Cheap to protect your investment.
Installing over head cabinets.
On most coaches that are built, builders usually try to find the
ribs to secure the cabinets, or just screws them to the plywood. This is another option.
After you have insulated the coach and are ready to install the plywood, (I use 3/8 ply)
in the locations over head cabinets will be installed, put a piece of 26 gage sheet metal
the length and width of the cabinets. Secure to the ribs with flat rivets. Rivet the 26
gage sheet metal to all the ribs that it contacts using lot of rivets. Next put up the
plywood as you would have. Now, when you put your cabinets up you can screw anywhere you
want and really have the cabinets up strong. Some builders use ½ plywood, but this is a
lot off extra weight. To build a coach that is well built, one that has good resale value,
and one that you are proud of, it takes time and a little extra money from the run of mill
coaches. And . . . all the little tricks that makes the job easy.
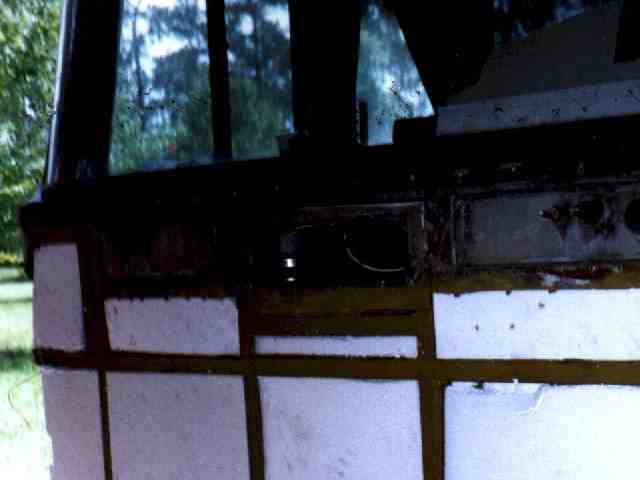
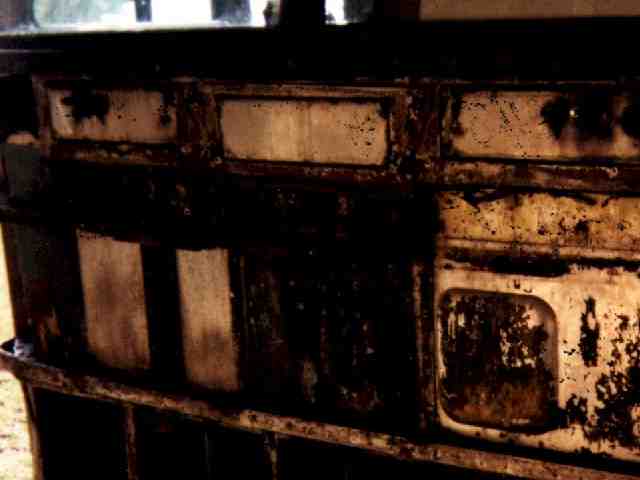
Interior panels and lurking rust.
Most of the time there is rust in the middle section where the
angled windows come down. I take all this out to the ribs. Then when I raise the roof I
X - brace between with ½ or 5/8 round steel rods. I weld them between each rib,
and foam to the floor. This is stronger than the sheet aluminum that MCI used. I
haven’t had any problems. The foam makes the coach very ridged. I also take all the
front skin off as all the 8’s I have seen are rusted out in the front. This is due to
the fiberglass and vent at the bottom on passenger side below the bottom molding. After
all the rust is cleaned off or ribs replaced, I coat with zinc chromate to stop any
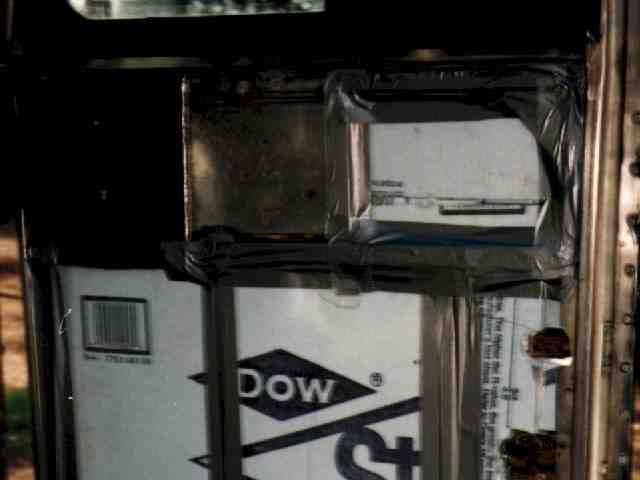
further rust. I then make a new front and insulate with 1½ " block foam.
Also take the interior door panel off and either foam the whole
inside of the door or use block foam. Ensure you have access to the bottom section. This
section needs to be accessible to install or remove the outside bottom rub panel. Here I
install block foam.
We'll keep the light on for ya
Now a small tip . To make it easy to get in your coach after
dark. Install a license plate light . You can get them at any auto parts store. I use the
little round kind . It fits in a ¾ inch hole, its 12 volt and can be hooked up to your
house system. Turn it toward the door lock and you have a nice little light to come home
to. Also note the shine (Tip# 001) and latch assembly that fits your hand and you don't
have to push with your thumb. This will be another tip.
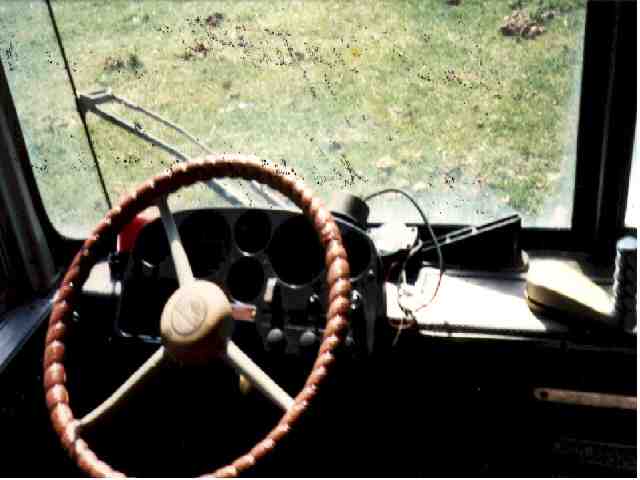
Installing a Tilt and Telescoping steering wheel for MCI
Go to a large truck salvage yard and find a late model, 80 or 90
Freight Liner long nose that has a tilt wheel in it, most do. Have it removed making
sure you get the mounting bracket and middle universal joint with about 8 inches of the
shaft . Also get all bolts that hold it to the mounting bracket. Freight liners have a
good looking steering wheel on them. You should be able to get one for about $300.
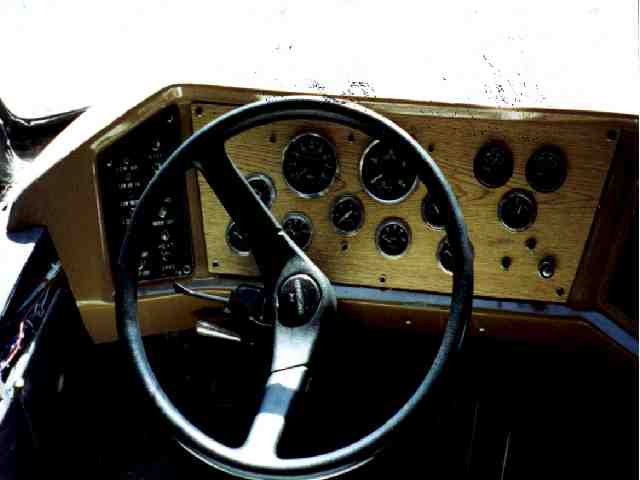
After you have taken your old wheel out. Fit the mounting bracket
from the front of the floor, tight to the front and bolt it to the dash where your old
wheel bolted on. Don’t tighten real tight, as you will need to adjust at a later
time. Now, install your new wheel to the bracket. Adjust the bottom to make your wheel
straight. You need to build a bracket that will bolt it to the floor. The bracket will
have to come out over the heater pipes that run close to the front wall. Bend the bracket
over these and down to the floor. This is the point that you bolt the bracket down to the
floor. Don’t drill through the heater pipes. Now cut your old shaft, and add the new
shaft to the length that fit in the tolerance in the slip collar of the steering sector.
Weld the shaft. Now you have a wheel that you can raise and tilt. It makes driving easy as
the wheel sits back, more like driving a pick up truck.
Before and after photos for installation of tilt and telescoping column.
Installing and wiring updated headlights
Have you bought a set of those new square head lights that are 12
volt wired only to find that they aren’t as easy to hook up to your 24 volt coach as
you though? This may make it a little easier. If you have taken out the coach air, there
are some real heavy duty relays, in the box in the first bay on MC8's . Take one of them
and put it in the fuse panel. Next disconnect your 24 volt line from your dimmer switch
run it to the relay. Now come from your house battery with a12 volt line and hook to the
line side of the relay, then run a line from the load side of relay to your dimmer switch.
You now have 12 volts on both high and low beams. All you need to do now is hook up those
neat looking square lights. It is easier to do than you think. I use #12 wire. Don’t
take 12 volt from the middle of your 24 volt system as this messes up your charging
system. And the wire that is there isn’t heavy enough.
Way to save money on wiring
I buy 100 foot extension cord when they're on sale number, 12/3
conductor wire size. I can get them for as little as $15.00 and they come in different
colors. I get several different colors and use yellow for air conditioners, orange for
lights, black for wall plugs (120 volt) and green for 12 volt. They are UL approved and
very flexible. You need to tin the ends when you hook them up to your main and on other
connections use High lugs. Use an indent sqeezer to make good connections. You can buy 100
ft. cords with plugs on them cheaper than you can buy the wire by the foot. I use about
500 ft. of wire on a coach.
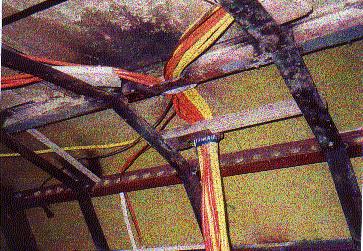
This shows how wires are run in the roof. Run them were they will come down the wall to
the fuse panel.