There are times when it may be necessary to work under
your bus. Since building these ramps, I have repaired numerous leaks, worked on air bags
distribution lines and got under the bus for a complete pressure washing. They have really
come in handy for all kinds of repairs and inspections. It sure is convenient being able
to get under the coach for all those repairs you can do, without taking it to a shop.
After deciding what I wanted in a set of ramps, building them was
easy. Also, I have to say the other motivation was the most expensive part of the project,
the plywood, was given to me from a floor removal job. I drop the 740 automatic down in
low and the coach moves right up. They are heavy, but can be moved easily with a two wheel
dolly and slid into place.
Doing any kind of work under a bus can be dangerous! Air
bag suspension can deplete faster than you can escape!
Design requirements
- Safety, safety, safety, safety, safety, safety, safety
- Be able to drive all rear wheels on to the level part of the ramps
- This would require building four ramps with a minimum of 5 feet
on the top to rest the tag and drive axle wheels
- With the air bags completely depleted, the ramps could be moved under the bus
- If for any reason the air bags could not raise the coach, you
could slide the ramps under, drive the bus onto the ramps and work on
the problem. Also this allows removal of
the ramps should the coach lose air over time and the ramps are left under the bus.
- Readily available materials that are easy to work it, fairly inexpensive, and of course
strong and durable.
The Ramps
Using AutoCAD, I plugged in the design requirements and came
up with the following configuration:
Four ramps with the overall dimension of 8 feet long x 1 foot wide x 10 inches high.
Bottom layer is 8 foot long, top layer is 5 foot long, with each layer cut 3 inches
shorter than the last with 45 degree bevels. This resulted in 13 layers of 3/4" shop
grade plywood. Materials
Eleven sheets of 3/4" shop grade plywood
Several pounds of 2 inch galvanized sheet rock screws
Couple of pounds of 16 penny nails
About nine large tubes of liquid nails sub-floor glue
Construction
The bottom sheets of plywood are the only pieces that are 8
foot long. I cut a 45 on the ends and started each layer back 3 inches from the last
layer, number 13 ended up with the 5 foot I was looking for to be able to park both the
tag and drive axle on a level surface when on the ramps.
First, rip eleven sheets of plywood length wise, 12" wide.
Set aside four sheets of 8' x 12" for the bottom layers and cut four 60" long
for the top layers. Piece the layers (except the bottom four and top four) to obtain the
required lengths. I wanted a continuous layer for the top and bottoms. Since all the wood
will be glued, screwed and nails, they will be plenty strong.The ramps have thirteen
layers with the following lengths:
4ea x 96" x 12"= 32sq/ft
4ea x 93" x 12"= 31sq/ft
4ea x 90" x 12"= 30sq/ft
4ea x 87" x 12"= 29sq/ft
4ea x 84" x 12"= 28sq/ft
4ea x 81" x 12"= 27sq/ft
4ea x 78" x 12"= 26sq/ft
4ea x 75" x 12"= 25sq/ft
4ea x 72" x 12"= 24sq/ft
4ea x 69" x 12"= 23sq/ft
4ea x 66" x 12"= 22sq/ft
4ea x 63" x 12"= 21sq/ft
4ea x 60" x 12"= 20sq/ft
Total 3/4" plywood required = 338 sq/feet..... or 11 sheets of plywood
Adjust these measurements to suit your needs. A GM, two axle would require considerably
less material.
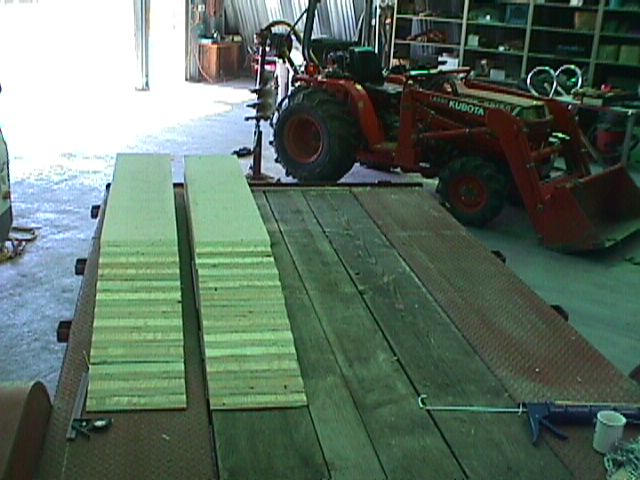
Two of four ramps made for the set. |
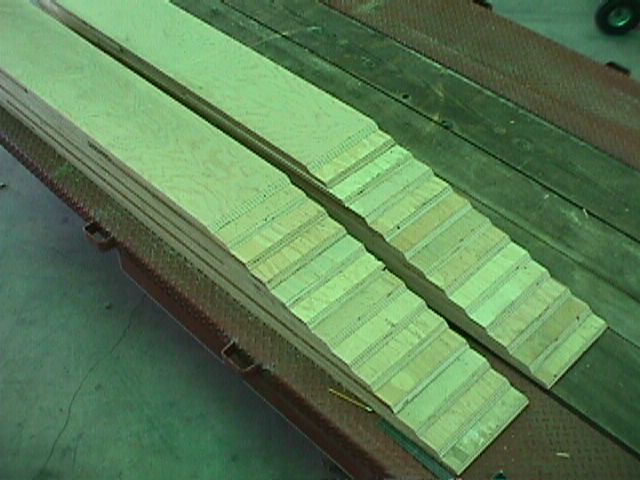
You can see the 13 layers with 45 degree bevels. |
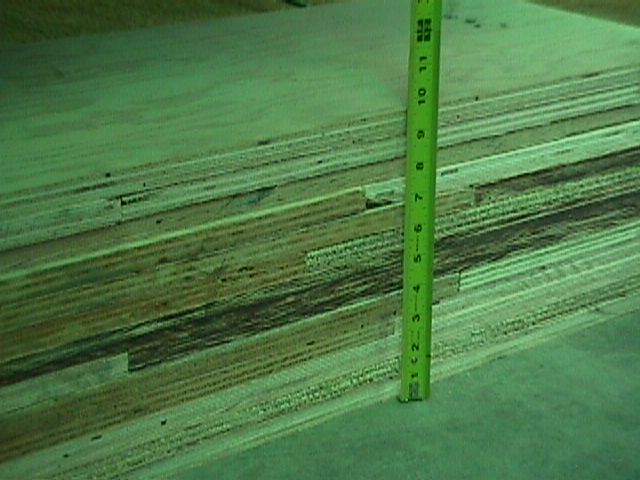
Finished height for 13 layers of 3/4" ply was about 10" |
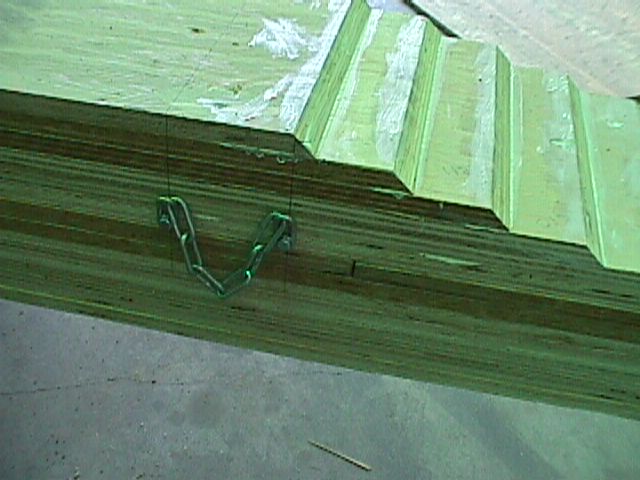
Handles - short chains with lag screw and washers. |
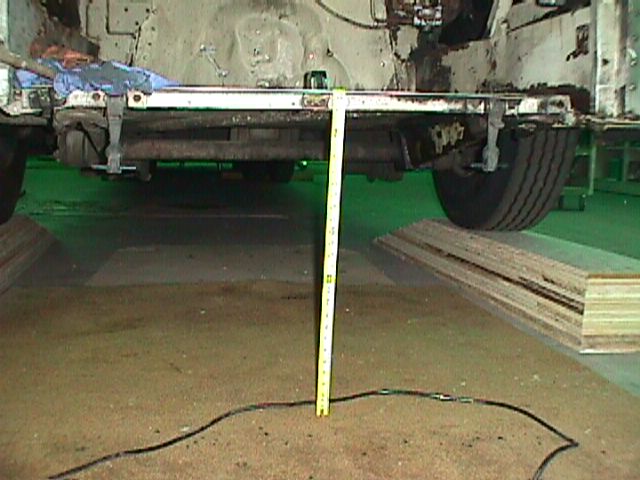
Over 2 feet of clearance! |
Enough room to sit up under the bus! |
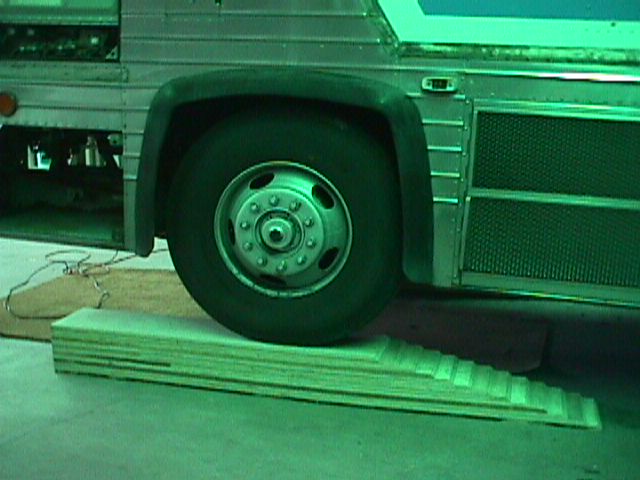
Ramps positioned forward of drive axle, ready to use. |
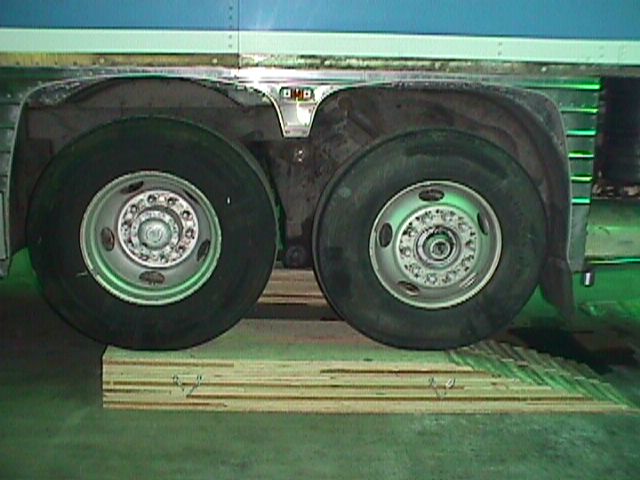
All wheels on level top surface. |
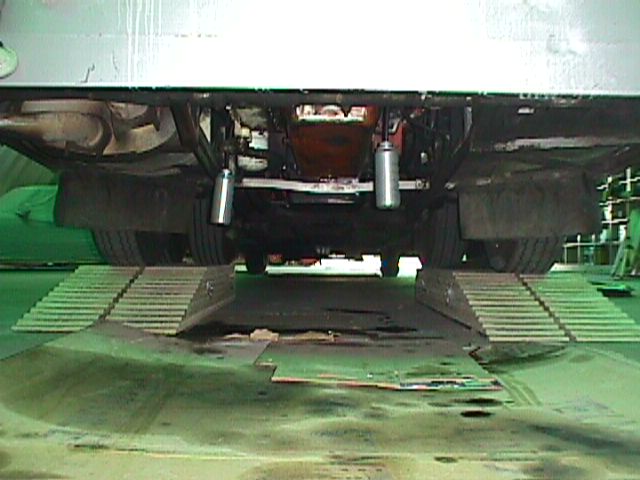
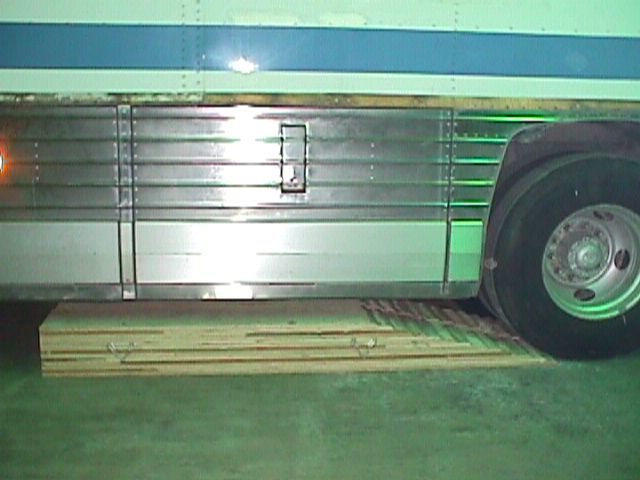
Tons of room! Note Hi-tech (temporary) air box drain containers. |
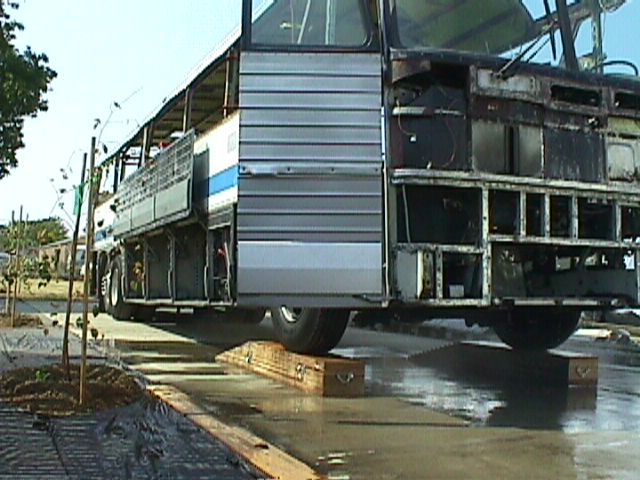
All that clearance with only a 10" high ramp. Hot water, high pressure washing front
end. |
|